So, You Want An Above-Ground Pool
[Note: I wrote this last year, but never got around to actually posting it at the time. Since I recently set up my pool again, it became a bit more topical. Enjoy.]
One of the reasons I haven’t been playing many videogames this past month is because I was setting up an above-ground pool. In the spirit of my other apropos nothing post about shipping PS1/PS2 games, let me chronical the struggles I had with getting mine set up. Maybe you can learn from my mistakes, maybe you just enjoy the schadenfreude.
Step 0: Do you really need one?
No, seriously, do you really need one? I got mine on the cheap, but a yearly pass to a sorta nearby pubic pool would only have run me $200, at worst, per year. By the time everything is done, you are likely going to be spending $1000+ and who knows if anything you bought is going to survive the five years (or more) it takes to break-even. Now, you are probably going to use a pool in your backyard on a whim more often than getting into a car and driving somewhere, but just acknowledge the math involved.
Also, do not bother with any of this late in the season. Like in August. That’d just be dumb.
Step 1: Survey your domain
It’s very important that you look at what you’re dealing with terrain-wise before you even consider pool options. Do you have a good space for one? Is it near trees? How tough is the soil? Are you going to try do everything by-the-book and actually get a permit for your pool, to include all the things the permit requires? Some of those things include having a fully-enclosed, self-locking fence, being X distance away from the home, and so on.
For me, my house already had a “dog run” area that was fully fenced up:

The grass looks sketchy, but that was because I had just mowed on the lowest setting. What is not obvious from the picture – or even looking at it in person – is how the ground isn’t level. Like, not even a little bit. But I’ll get into that in a minute.
Step 2: Secure a Pool
The retail price of an above-ground pool varies, but the 9’x18’x48″ pool we settled on is $800 normally. I bought mine for $100. How? Warehouse resellers. Sort of like eBay for items that people returned to Amazon, who then sold to warehouses for pennies on the dollar. I’m not going to give out the name of the one I used, but basically I saw some pictures of a very beat-up box online but the pool liner still looked wrapped in plastic, so I rolled the dice. Spoiler alert: it worked out.
Step 3: Prep the field
Do not install a pool in August. I repeat, do NOT install a pool in August.
So anyway, there I was, installing a pool in August like a moron. I borrowed a 25-year old mini-tiller from a neighbor and started to work on the 9×18 area where the pool would be located. Phase 1 was just clearing the grass out. If you have a sod remover or other fancy equipment, use that. Otherwise, make sure to till and rake that top layer of dirt/grass away and compost it elsewhere or whatever.

Step 4: Level the playing field
Mentally accept that 80% of the work in setting up an above-ground pool is leveling the ground. Don’t cut corners, don’t say “fuck it, that’s good enough,” don’t do this in August when your pasty ass is sweating buckets within the first 15 minutes of being outside.
The dirt needs to be level. I used a 3ft level taped onto a wooden 2×4, but that was sketchy. You can (and should) buy a contractor level, with longer being better – they are expensive on Amazon, but my local hardware store had a 6ft level for like $15. In any case, I took my level and… realized that the cleared area had a significant slope. Like 3 inches or more.
I recommend digging down rather than filling up. The idea is to use a tiller to get the dirt nice and frothy, and then shovel it over onto the lower end. Two birds, one shovel. The problem with just buying a bunch of topsoil and raising the low end is two-fold. First, it’s difficult to know how the topsoil is going to behave once compressed. Like, even if you tamp it down, I noticed it springing back up in a way four feet of water per square inch was not going to allow it to. Secondly, keeping the dirt and topsoil where it is supposed to be becomes tricky. If it’s just in a big pile, erosion might see the sides start to lower and things becoming increasingly uneven.
Step 5: Measure twice, dig once
Once everything seems level, measure everything again. Read the instructions, look at pictures.
My pool is 9×18 so I leveled a 9×18 area. Had I looked at the goddamn box one more time, I would have realized that while the bottom of the pool is indeed 9×18, the side support beams actually extend out another 1.5 feet on both sides. While we ended up just rolling with it, this means the side walls are bowed in and who knows if there is any permanent damage to the steel pipes or what sort of extra wear that will have done to the liner. All of which could have been avoided by looking at the box.

Step 6: Get some help setting it up
The instructions say 2-3 people can set up the pool in 30 minutes. Get at least that many people and budget 2+ hours. I’ve seen videos of people doing it themselves, but not when it’s August.
It is also important at this point – and probably before this point – to understand where things are going to be located. For example, where are the holes for the pump? Where is the drainage port? It’s a huge pain in the ass to move anything once those supports go in, so avoid having to make corrections.
Step 7: Fill and (hopefully) enjoy
At a certain point, you won’t know if everything worked out until you actually start putting in water. You are going to want to try and smooth out any wrinkles in the liner when there is less than an inch of water inside. It’s also very important to walk all along the bottom to feel for any errant rocks or pokey things that might cause issues.
For me, we ended up fully filling the pool and then had to completely empty it because the water level was a difference of 4 inches. The pool instructions say “no more than 1 inch difference” but most of what I read online suggested 2-3 inches would be fine. The issue was more than just the water level though, as we also had the side wall concern I mentioned earlier. So, after it was emptied, I put in a bunch of topsoil under the low side, dug 1-2 inches down on the side supports and filled it back up. It’s not perfect still, but we’ve successfully used it for two weeks now and it just needs to make it a few more before the likely end of the season. Next year, I will relevel things properly.
Not in August, of course. Because that would be dumb.
Addendum
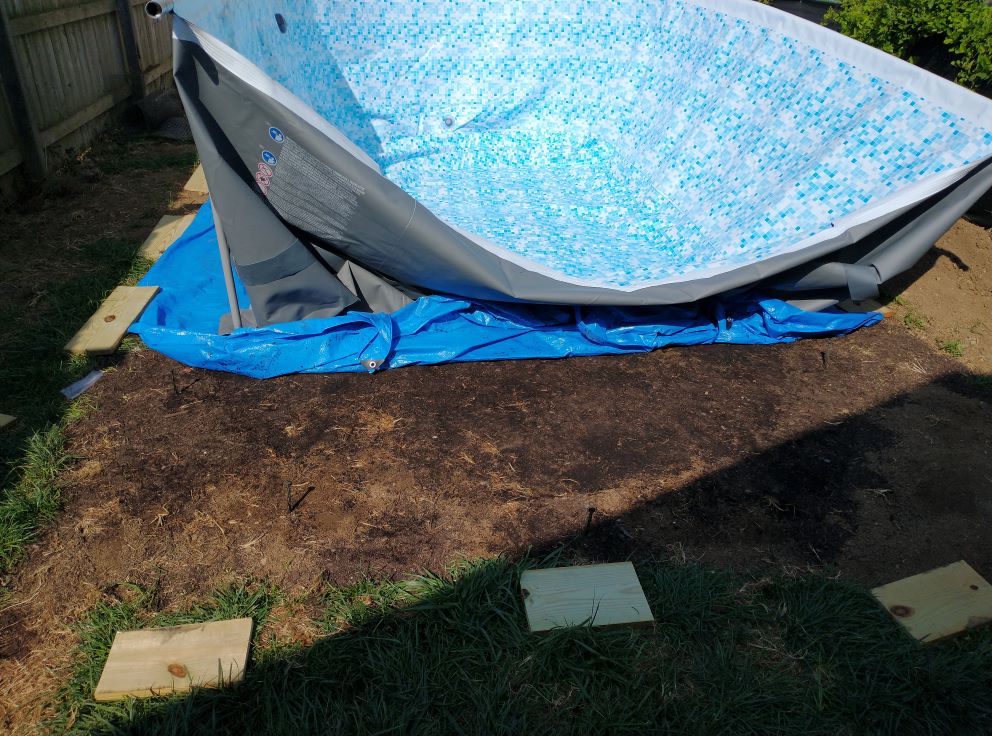
To help protect the bottom of the pool, we used a giant tarp underneath. A tarp will not prevent rocks from poking your feet from inside the pool and otherwise being a hazard. No, I don’t camp a lot, how can you tell? Also, I do recommend rolling up the ends of the tarp so the support poles don’t push on them. This is primarily so you don’t have a little mosquito puddle just sitting there.
Buy and cut some treated wood for your supports to stand on and dig them into the ground a bit. I briefly thought about using paver patio stones, but was worried about what would happen if the stones snapped. A few of the wood boards are already in rough shape, so I’m glad I stuck with wood.
If you end up with wrinkles in the bottom of the pool after there is too much water in there, one lifehack solution is to buy a new old-school plunger. You know, the ones that are flat on the bottom and are terrible for plunging toilets. According to some clever Youtube videos though, they work just fine in lifting up the pool liner to help smooth out wrinkles.
Those chlorine tabs you put in bobbers are for maintaining a given chlorine level. Pool “shock” is super-concentrated chlorine to raise levels high enough to be safe. You can really optimize different chemicals (pH, alkalinity, etc) if you want to, but it’s all in service of keeping proper amounts of chlorine.
I recommend two different types of water testing kits. The first one I bought was all fancy with eye-droppers and little bottles of chemicals. Kept saying I didn’t have any chlorine though. Bought the test strip kind just to confirm and, hey, actually I had 5ppm chlorine in there. It’s possible that there was user error involved with the fancy test, but that issue is still resolved by having two different testing kits.
Solar covers do indeed work. The one I bought looks basically like a 22-foot diameter heavy-duty piece of blue bubble wrap. Threw it on, cut it into a rough oval shape with scissors, and will hopefully get another few weeks of reasonable pool use this Fall.
Posted on June 14, 2024, in Guide and tagged Level the Ground, Meatspace, Pool, What Am I Doing With My Life?. Bookmark the permalink. Comments Off on So, You Want An Above-Ground Pool.
