[FFXIV] The Long Road
Implausibly, I continue to pay for a FFXIV subscription.
In the last week or so, I have made some progress both in the story and in the Job system, hitting level 35. It is slow going though, as I do not consider the game anywhere near the top of my evening entertainment preferences. I will typically play for about an hour or two, run into so kind of roadblock, and then log off and play something else.
The roadblocks are generally the pointlessly forced dungeons – I seriously had to run a dungeon because the Main Story Quest called for cheese, literal cheese – but I am also running into level breakpoints too. My understanding was that XP was sped up so that the sidequests were no longer necessary to complete. That seemed to be true under level 30, but since then, I have consistently been between 50%-60% of a full level behind.
So, yeah, do those sidequests.
Story-wise, I have certainly hit that stage at which the plot supposedly picks up. And it certainly has, comparatively. I do find that the greater focus on Empire soldiers is more able to keep my attention. Traditional fantasy is not especially interesting to me, except when it tends towards more grimdark themes or “realism.” Fantasy + Magi-Tek shenanigans though, have been interesting to me since I first booted up FF6 in my SNES.
Gameplay-wise, not much has changed. My Archer is now a Bard, and that means… more damage cooldowns. I do actually enjoy having group buffs, as it reminds me of the old WoW paladin days. Beyond that, combat is formulaic, boring, and completed in a daze-like trance 100% of the time. It’s still worlds better than my experience as Monk, but I think most of that is because melee in FFXIV feels terrible. And that is probably mostly to do with the high-pitched squeals and screen-flashes that constitute FFXIV attacks. Nothing feels particularly weighty or anchored to the world.
While the sale has since closed, Amazon and a few other places had the Stormblood expansion on sale for $25. I was tempted to purchase it for all of two seconds. The very real problem is that I am ages away from even getting to the end of the ARR storyline, let alone getting to the required Heavensward stuff (which is thankfully included in Stormblood). There is no guarantee that I make it to level 50 at my current pace, so it seems a bit silly to be buying expansions. At the same time, not buying the expansion sort of depresses my desire to hit the end of the road, as that would mean either taking a break until the next sale or giving up.
Oh, well. I shall continue as time and interest permits.
Star Cards
You may have heard a lot of people talking about how bad the Star Cards are in Star Wars Battlefront 2 (SWBF2), but there appears to be a dearth of information on what the cards actually do. Well, I took some screenshots, and will transcribe a lot of them here before.
Among the four classes, the following two abilities are in all of them:
- Brawler: Melee kill regens 50/65/75/100 HP
- Resourceful: All abilities recharge 10%/15%/20%/28% faster.
I did not experience much melee action in my limited time in the beta, so I’m not entirely sure if there is a special damage bonus for attacking from behind, ala the kill sequences from the Battlefield series. Somehow, I doubt it. Resourceful though, is a particularly impressive bonus. I don’t know the default cooldown for most abilities, but assuming 30 seconds, that results in the cooldown being 27/25.5/24/21.6 seconds. Not that this is a WoW raid or anything, but over the course of 5 minutes that means you can press the button almost 14 times instead of 10.
The other noteworthy Star Cards:
Officer
- Officer Presence: Reduce HP Regen Delay by 20%/25%/30%/40%
Heavy
- Defender: Gain 4/6/7/9 score for each hit you take
I was not able to test Defender, but this seems just a bit insane. Is there an internal cooldown? Otherwise, I can imagine some people rolling out Heavies and soaking up some long-distance fire for a few minutes before suddenly coming back as a Hero and murdering people. For reference, you typically get zero points for dealing damage until and unless the target dies.
Assault
- Assault Training: Gain 20/26/30/40 HP on kill
- Vanguard Refresh: Refreshes your abilities on kill 25/23/21/18
The Assault class in general felt extremely weak in the beta, even though it technically has more HP than the Specialist. Getting up to 40 HP on a kill would go a long way in fixing that. Additionally, Vanguard Refresh is just a straight-up upgrade to the default Vanguard ability, which sees you put away the blaster for a shotgun and quicker movement. Not sure what the bonus does exactly though.
Specialist
- Stealth: Remain hidden when firing, and deal 65/75/100/150 extra melee damage.
- Infiltration: Scrambler: Marks enemies for allies and scrambles scanners in 10/11/12/14 range.
- Trip Mine: (replaces Thermal Binoculars) Laser Tripmine with a 30/26/22/16 cooldown.
The Specialist is really quite absurd all-around, even before the Star Cards IMO. Yeah, they will die to a Heavy in a reasonably fair fight. However, the E ability gives you an infinite-clip burst-firing gun, makes you invisible to radar, shows everyone else on your radar, and causes you to speed around the map. Have I mentioned that getting a kill resets the timer too? Adding the Infiltration: Scrambler to that and/or the Trip Mine is just bonkers.
The biggest Star Card offender from a blogging perspective is Boba Fett. Here are his upgrades:
Boba Fett
- Acute Concussion: Concussion lasts 1/1.5/2/4 seconds longer
- Quick Refill: Jetpack refills 20/25/35/40% faster.
- Fuel Efficiency: Jetpack burns 15/18/21/25% slower.
- Death from Above: during Rocket Barrage, take 50/60/75/100% less damage
- Intense Barrage: Rocket Barrage fires 30/40/50/70% faster (more rockets)
As you can see, Death from Above in particular goes from 50% damage reduction while using a very visible ability to complete immunity. Intense Barrage adds more missiles to said attack for free. Or you can combine the two Jetpack cards together to get a much larger Jetpack uptime.
The characters aren’t the only problem either. Here are three cards from Starfighter:
- Bomber has 5/10/20/40% more HP
- Fighter deals 2/4/7/10% more damage with primary fire
- Fighter takes 50/100/150/200% longer to lock onto with missiles.
If you are in a fairly even dogfight, but your opponent has 40% more HP or they deal 10% more damage, or you have to wait 200% longer than normal to get a lock-on… well, that’s not really a fair fight anymore.
Things can always change, of course. I don’t think that the Star Card system itself is going to change, but there will probably be tweaks to the exact percentages. And entirely new options/cards.
That actually might be where most of the concern should be centered. Because as we all know, the payment structure of games inform their ongoing development, which means the designers have incentives to create more powerful Star Cards later on. When they are undoubtedly added into the game “for free,” the average player might be able to craft the first two tiers with regular currency, but whales and competitive gamers alike will have it maxed out as soon as the servers are up.
Impression: Star Wars Battlefront 2
I managed to play a few hours of the Star Wars Battlefront 2 (SWBF2) beta this past weekend. I had not actually played any of the prior titles in the series, nor does the Star Wars IP hold any particular cachet with me. I have played and been a fan of the Battlefield series for over a decade though, so my impressions are based more around that.
In short: it’s decent fun.
One of the first things that should be addressed is the Star Wars-ness. I mentioned that the series holds no particular cachet with me, but that does not mean I am unable to appreciate cool sci-fi battles when I see them. In this regard, SWBF2 hits some seriously good notes. Being a part of a Stormtrooper charge through a wooded area, blaster fire going every which way, is exactly as cool as you can imagine it being. I am also incredibly impressed by how the other map can cast the player as a Droid. I think the hitboxes are the same as the more common human ones, but it remains an interesting experience seeing your Droid teammates scurrying about.
The space battle map is whatever. I’m not a huge fan of flying vehicles in this or any Battlefield game, entirely because I lack whatever faculties are necessary to shake someone off my tail. I have fun shooting people, launching missiles, etc, then someone gets behind me and I inevitably die. I know that it’s possible to lose someone, because I have been “lost,” but I cannot do it.
On a mechanics level, the game has a pretty interesting approach. There are four base classes in the game, and each class has three abilities (in addition to different weapons). Abilities are all cooldown-based, with the exception of the Specialist’s Thermal Goggles, so there is always a tension between using it ASAP to eek out every possible advantage, or “saving it” for when you might really need it. Do you chuck a grenade in the off-chance someone is in that hallway, so that you can chuck a second one later? Or do you wait for a specific situation? Beyond that, the four classes themselves seem relatively balanced – Officers are pretty bad solo, but shine in groups – and each organically play out quite differently due to said abilities.
Where things falter quite a bit is in the teamplay department – the only teamplay is accidental.
Again, I come from a Battlefield background, and I also recognize that EA might not want to copy all (or any, apparently) of its systems. But the lack of squads, the regenerating health, infinite ammo, infinite abilities (after a cooldown), no spawnpoint choice, no revives, no Spotting… in every way, SWBF2 is an arcade shooter. I can appreciate the fact that some things wouldn’t make sense in the Star Wars universe – shock paddles bringing Storm Troopers back to life, etc – but there is so very little connecting you to the rest of your team unless you’re playing an Officer, who in every other way is worse than any other class you could have chosen.
The hero system sort of wraps this all up in a big bow. As you complete objectives and get kills, you earn battle points, which you can spend to respawn into battle as special characters, vehicles, etc. The money-shot heroes cost 5,000 points, which take a rather significant amount of time to accumulate, and thereafter lock your team out of choosing said hero until you die. From my few hours playing, I can say that the ones using Lightsabers are OP as shit, as they dance around one-shotting everyone, then dancing away to regenerate a health pool five times larger than normal. There are still some “more powerful than normal” options for the rest of us plebs, but there are still limited slots.
I would be remiss if I did not mention the current Star Cards P2W fiasco.
At the end of each match, you gain a number of Credits which can be spent in increments of 1000-1100 to purchase crates, which then hold three random “cards.” These cards can be improved abilities for any of the classes – including the heroes – or even alternative abilities that replace other ones. Or they can be cosmetic things, emotes, etc. Cards have different levels, with higher levels corresponding to better bonuses. At the beginning, you can only equip one Star Card, but as you gain more cards for a particular class/hero, that class/hero “levels up” and can equip up to three.
The fiasco part of this is that the entire system right now is pretty much naked Pay-2-Win. These crates can be unlocked during normal play, or you can unlock as many as dollar bills you have. Since character levels appear to be derived by how many Star Cards one has – as opposed to, you know, how long you have been playing said class/hero – not only will buying a ton of crates give you more options, they will specifically allow you to equip all of them. And these are direct power increases. Lower cooldowns, damage reduction, regenerating health, more “ammo” per clip, etc. It might not be impossible to take out a fully-decked out player as a brand new player – unless we’re talking about the Star Card that gives Boba Fett 100% damage reduction during Rocket Barrage – but in a FPS the margins between winning and losing are measured in milliseconds. Every percentage bonus counts. Especially when your target survives with 1 HP and regenerates to full a few seconds later.
As if that was not bad enough, the real problem here is that this is SWBF2’s entire progression system. While you can eventually earn a crafting currency to construct exactly the Star Card you desire, there is otherwise zero means to acquire better (or any) cards of a particular class. In the Battlefield series, playing as Assault will let you unlock more/better Assault abilities, using the same gun will unlock components for said gun, and so on. In SWBF2, it’s all lockbox RNG. I can appreciate the occasional incentive to try out a different class based on a good loot drop, but as the primary progression mechanism? That’s dumb.
The whole Star Cards thing probably deserves its own post, assuming you haven’t already read 37 variations by then. But, yeah, it’s basically as bad as it looks.
Overall Verdict:
Unsurprisingly, the jury is still out.
As mentioned before, the game is decent fun. If you are looking for an arcade shooter and like Star Wars, then it is probably a no-brainer. If I were eventually purchase SWBF2, I expect it to follow the same trajectory as TitanFall 1 & 2, for the same reasons. Just something to play around with for a few hours here and there, to kill time. As opposed to the trajectories of Battlefield 2, 3, and 4, which remain mentally compelling and engaging to this day.
EA Impressions: SPAZ 2
The original Space Pirates and Zombies (SPAZ) was a hidden indie gem back in the day, and saw me through almost 40 hours of gameplay. Granted, it had some lousy pacing and the early portions of the game weren’t particularly great either. But hey, it was done by a two-man dev team, and hit some great notes in the middle there somewhere. Hearing about SPAZ 2 being close to Early Access graduation and on a Steam sale to boot, I just had to take a look.
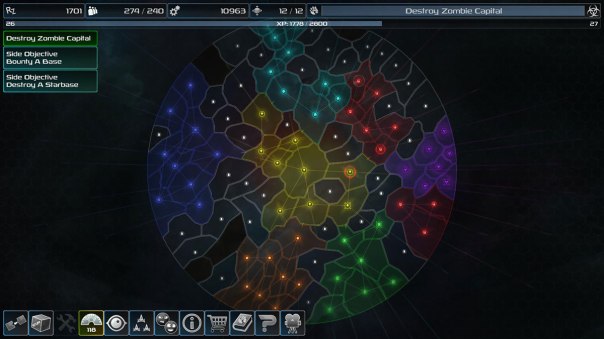
Where 99% of the gameplay takes place.
Well, then.
SPAZ 2 is set in same universe as the original, and even continues the story a bit. That and the ship names are pretty much the only things left in common with the original title. The principle “game” here is a sort of galaxy map… thing. I don’t really know what to call it. Simplified RTS? Except time only moves when your ship moves, so Real Time doesn’t fit. Nor does Strategy, now that I think about it. If anything, it reminds me of games like Eufloria, where you are basically collecting infinite resources and expanding your empire while everyone else is doing the same.
In the original game, combat was sorta handled like a twin-stick shooter. In SPAZ 2, combat is a formality. While you can elect to aim your weapons like you wish to actually play a videogame, the game’s tutorial advises to stick to “Battle Wagon” mode, which is where your weapons automatically fire and reload according to their ability to hit things within their range. The former supposedly allows you to target specific sections of enemy ships in an effort to break them off and commandeer them as your own, but the reality is that none of it really matters. Scrap, the currency of SPAZ 2, is abundant, and you’re unlikely to know what components your opponents are using anyway.
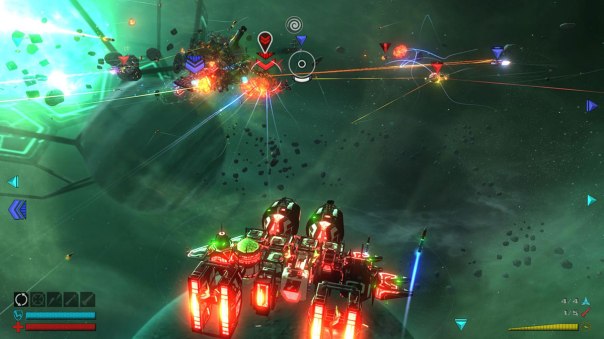
Look, Ma, no hands!
The utter lack of regard towards the combat system is, frankly, baffling. There is a video on Steam from the devs demonstrating how to play SPAZ 2 in VR mode. Holding RMB down even brings up a targeting reticle. But… why? No game systems support, encourage, or require any manual control during battles. I mean, there’s a tiny element in the bizarre looting system they have, as the components shot off from downed enemies is not assured to be in the normal post-combat loot table. But you can’t collect these pieces – you must physically bolt them onto your own ship. Which is another whole gameplay element that isn’t even defrosted, let alone half-baked: if components are popping off your ship, you are dying, and you won’t live long enough for it to matter.
Maybe all of this is due to me being in the early game still? Maybe it’s due to Early Access? I dunno. What I do know is that the fun of the original SPAZ came from combat, and everything else was a chore. In SPAZ 2, combat is now a chore, and you are left with extremely simplified empire management as your only element of gameplay.
Humor is there, at least.
Hopefully this gets better, because I’m already past my Steam refund window.
Gaming Middle Class
Gevlon had an interesting post musing about the gaming middle class.
The current situation is this: if you are a time-rich player without a lot of money, there is no better time to be a gamer than now. Just think about how many F2P titles out there that are available. Similarly, if you are a money-rich gamer looking to get their whale on, look no further than damn near anywhere. If you fall somewhere inbetween, then you essentially get the worst of all possible worlds – pwned both by the time-rich players able to dedicate more time than you, and the money-rich players who buy every advantage.
Making things even worse, Gevlon notes the very model seems to squeeze out the middle-class:
The same question can be asked in every monetized game: why pay anything unless you go full whale? Either enjoy the game for free (if it’s enjoyable), or pay enough to be the king of the hill and enjoy pwning “n00bs”. I believe more and more people will realize this and stop paying/playing. Which in turn creates the wrong impression that potential players are either free or whale, making the games more monetized.
I have experienced this several times in the various phone apps I use to kill time. Clash Royale is an example, insofar as you should either be going all-in or not at all. If you buy a little advantage in the form of bonus chests or upgrades from the shop, you will likely be able to leverage that to boost your rank on ladder. Problem is, you then are facing either whales who are less skilled than you but are leaning on overleveled cards, or people who spent a lot of time getting to that rank with their normal cards and are likely better than you head-to-head. Eventually you will settle at your 50/50 skill range, but that doesn’t make the games in which you lost to overleveled garbage players feel any better.
Another example is a gacha-style anime-inspired game that I will leave nameless, as they are all basically the same. While you can unlock new heroes randomly from “vending machines,” there is a special vending machine that only unlocks when you reach VIP level 9. Ranking up your VIP levels is 100% dependent on spending real money buying diamonds, and VIP 9 requires $200 total to reach. That’s right, two hundred US dollars. This is quite literally pay-to-win, as the special vending machine has exclusive heroes much more powerful than anything else.
Nevertheless, I have still spent ~$35 and ~$20, respectively, in both games over the year or so I’ve been playing them. Like many games of their ilk, a “small” “investment” towards the beginning of the experience allows you to remove some obnoxious barriers for the rest of the game. In Clash’s specific case, there was 10x value deal that remains the best deal to date, such that if one was ever going to spend cash, it would be for that.
As noted, the trouble is that the very monetization scheme punishes middle-class gamers, further polarizing the remainder. How would you even focus on the middle-class in this or any scenario?
Well, just ask the WoW devs.
After thinking about it, the (intentional or not) design philosophy behind WoW from Wrath onwards caters almost directly to the middle-class gamer. The time-rich player will be decked out in the best gear either from raiding or grinding, no matter which expansion we’re talking about. The middle-class though, is unlikely to be able to raid very much given inconsistent hours. Enter LFD, enter LFR, enter Badges/Honor/etc.
Many people will try to exclaim that constant gear resets – happening on a patch basis rather than expansion – hurts people by invalidating all the work you did. Guess what: if frequent gear resets hurts you, you’re time-rich. If you want pain, try doing anything useful outside of a progression raiding guild in the Burning Crusade. If you were not cresting the wave of attunements at the right time, you were stuck in the backwash with little way forward.
So, if you want a model for capturing the gaming middle-class, WoW is it (and presumably FF14). Subscriptions to put everyone on the same field, then allow the time-rich to grind/raid their way to advantage, but cap said advantage with things like weekly lockouts and frequent gear resets. Keep the delta between the haves and have-nots at a reasonable percentage. Make progression possible without needing to specifically put a videogame event on your IRL calendar. Season with some whale-bait (WoW Tokens, cash shop) to taste, and you’re good.
Auspicious Timing
Looked at my email earlier today, and saw these three right in a row:

While I neglected to unsubscribe from the Humble Monthly before and got burned a month or two back, the current offering is something I am interested in:
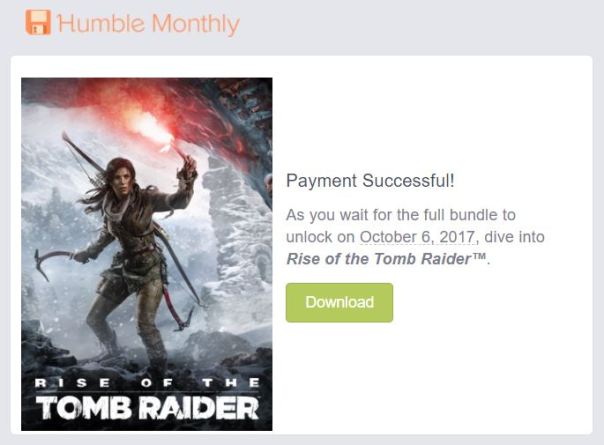
The wishlist item on sale in Steam today? Hmm:
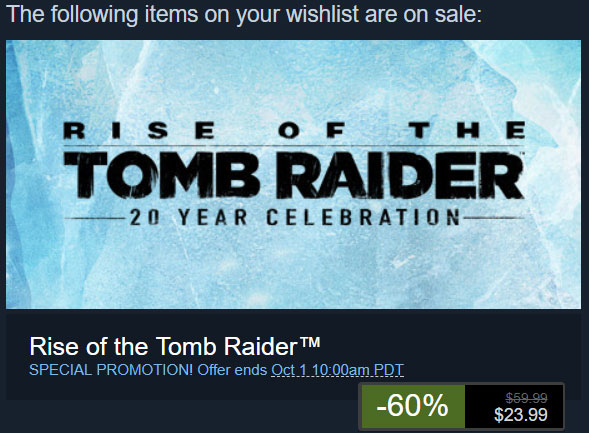
Technically, the above Steam offering includes the Season Pass for the game, which includes DLC that adds ~3 hours to the story, some new game modes, more outfits/weapons, and so on. You can buy the Season Pass for $12 by itself, making the Steam bundle technically cost the same as the Humble Monthly… aside from the free mystery games, of course.
Looking back years from now, Steam is still going to be known as one of those transformative phenomenons that changed the way we bought and played games. But more and more, sites like Humble Bundle are going to deserve something more of a footnote on that same page of history.
Advanced Ark Guide
A lot of the fun of survival games is learning from your early pain and suffering, figuring out how everything works, then coming back and steamrolling those same challenges. If you are just looking for some early-game direction, I recommend reading the Spoiler-Free Beginner’s Guide. It gives you a leg up, but not the whole body.
The rest of this guide? The whole damn body. Read at your own risk of adventure.
General Base Considerations
First things first: build two beds. You can stick two practically on top of each other, while still fitting in a 1×1 Thatch hut. Beds have a ~5 minute respawn cooldown, but it’s per bed, so having two will effectively remove the cooldown. This is a good idea whether you’re at an outpost or your main base.
Second… go ahead and double or triple up on everything, wherever you are. A stack of 200 Metal Ore takes over 30 minutes to smelt in one Refining Forge. Split that stack across two Forges, and now it only takes 15 minutes. Chances are good if you managed to collect a whole stack of Metal Ore, the extra 125 Stone and 65 Hide for Forge materials are not going to be a limiting factor here.
Resources are cheap, time is not.
Similarly, if you’ve unlocked the Preserving Bin and have a dino capable of harvesting a bunch of meat, go ahead and throw down 3-4 Campfires at a time and light them all up. Stacks of Cooked Meat are always going to be useful, either as general walking-around food or Cooking Pot materials, and the collected Charcoal will useful for Gunpowder.
Third, take a moment to reflect on your base layout and location. How far are you from water? Are there strategic resources nearby? Is this area defensible? There is nothing particularly stopping you from recreating a primary base elsewhere… other than the logistics of either moving all your old stuff and/or tamed dinos. Better to get it right the first time though.
As far as layout goes, there are some obvious-in-retrospect ways of arranging things. For example, you are going to want most of your crafting stations and containers within reaching distance of each other without moving – this will allow you to move hundreds of pounds of resources between containers, e.g. double your max carrying capacity. Likewise, you will want there to be room for you to do the same thing when removing items from tamed dinos to your containers.
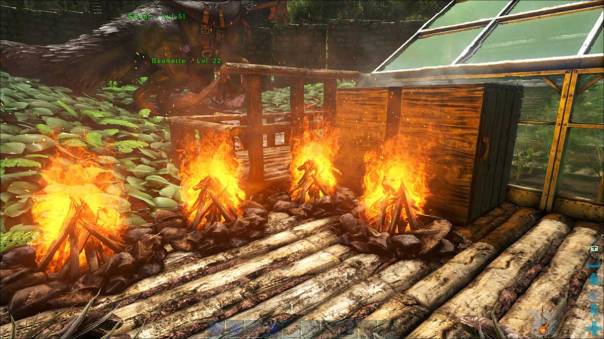
This was my base setup originally:
Not like this.
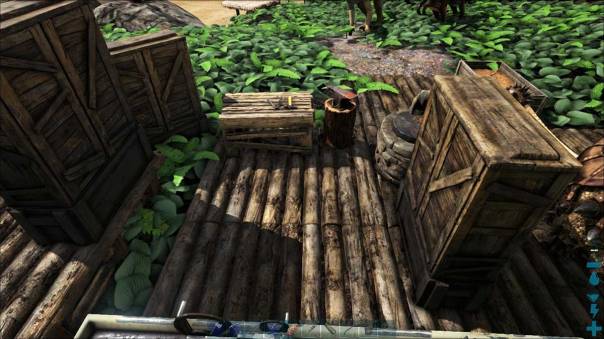
While everything was within reach, I actually had to hop over my Smithy to get out of the circle, and I was constantly running out of room for stuff. After watching some Youtube videos of other setups though, I realized that yeah, you can arrange your Large Storage Containers like this instead:

Doubles as a good OCD test.
Four times the storage and more room to move around. I removed the Refining Forge entirely, because my main base is nowhere near natural Metal deposits, and it’s much more efficient smelting on-site, and either bringing back the Metal Ingots or finished products.
Base Locations
Speaking of that, where should you be building a base? The answer is: wherever you want.
But, really, here are some other considerations:

Consideration 1: Metal Nodes
The above map displays Metal Nodes around The Island map, along with the Obelisks. No matter what you plan on doing in Ark, you will need Metal eventually, for weapons, ammo, structures, tools, or even just saddles. It’s not impossible to build your main base over near, say, the Red Obelisk, but you will be performing some serious long-distance trucking to get those ingots.
Another consideration? Check where beacons come down. That’s right, there are specific, set locations where beacons spawn on the regular. Most of them will be filled with garbage, especially if you build up in the southern areas of the Island. But, hey, free is free. If it’s all the same to you, I’d suggest going over to that next ridge where they spawn before setting down roots.
Finally, consider where some more esoteric resources might be available. Giant Beaver Dams, for example, are great sources of Cementing Paste and Wood. While the specific spawn locations are not fixed, there are some rough guides. Giant Bee Hives can spawn pretty much anywhere, and can technically be moved, but if you manage to find one near a potential base location, that area should be considered prime real estate. Oh, and if you’ll be needing Sap, maybe choose something closer to the Redwood Forest area.
Countering Dinos
When you are just starting out, just about everything is scary and can kill you. Once you figure out “the trick” for specific tiers of dinos though, they start becoming speed bumps instead of brick walls. Less scary, but can still kill you if you’re sloppy.
Here are the tiers:
Slingshot: This tier encompasses any dino encounter that can be defeated by simply backpedaling at normal speed. This includes any passive creature like the Dodo, but also more dangerous ones (once provoked) like the Trike and Turtle (Carbonemys), provided they could catch you. Which they shouldn’t be able to.
Spear: The simple spear provides enough knockback to keep the target at bay until death. Quintessential example being the Dilo (Dilophosaurus), aka the spitting one. Insects and most fish belong to this group too. Troodan, notably, do not, since they can leap back at you.
Bola: Too fast or large to be affected by the spear’s knockback, but small enough to be rooted by a Bola. Most common contender in this tier is the Raptor. While the Bola can trivialize encounters with these dinos, keep in mind that it takes a few seconds to wind up the throw, and most of these dinos are especially dangerous if they get the jump on you on the ground.
Platform: Encompassing the rest of Ark’s carnivores unaffected by the Bola, you will likely need to be on a platform (e.g. cliff face, rock, structure) in order to safely take it out. Alternatively, sometimes a platform can be substituted with a Wooden Spike Wall instead. This works well with creatures like the otherwise deadly Therizinosaur, who will happily attack the 3500 HP wall while you re-feather its head with arrows.
All of the above assumes you are trying to take down a dino unassisted, using common weapons around the level of the beast you are encountering. Facing down a Carno on foot with nothing but a Crossbow is scary. Doing so while wielding a Pump-Action Shotgun and 400+ HP with armor? Much less so. Hell, add two Trikes to your bodyguard detail and you can take out a large chunk of the food chain using just a Spear yourself.
Taming Dinos and Utility
It always bear repeating: Ark is a dinosaur taming game. What balance exists in the game is dependent upon it; a lone survivor isn’t one for long. Here is some early-game progression:
- Unlock the Slingshot at level 5. Go tame a few Dilos.
- Unlock the Wooden Club at level 8 and Bola at level 9. Tame some Raptors.
- Farm Hides for a while, using your Bow (level 10) and/or dino buddies.
- Unlock the Trike Saddle at level 16, craft it, and go tame a Triceratops.
- Unlock Mortar and Pestle (level 6) if you haven’t already, and use the Trike to collect hundreds of nacroberries in less than a minute so you can turn them into Narcotics.
- Tame another Trike, and leave both parked in your base for protection.
- Unlock Tranquilizer Arrows at level 21. Enjoy your ability to tame damn near anything.
Along with their normal characteristics, many dinos have “secret” talents that elevate their value far beyond normal. For the most part, you will need to have a saddle created for the dino in order to take advantage of their skills, but sometimes you do not. Here is a non-exhaustive list, based on the level at which you can craft a saddle for them:
- (Lvl 6) Phiomia: Force-feeding Stimberries will create Medium Feces on demand.
- (Lvl 16) Trike: Excellent tank/base defense, gathers 100s of berries at a time.
- (Lvl 18) Raptor: Best early-game mount, and protector while exploring.
- (Lvl 20) Equus: e.g. wild horse, has reduced Stone weight and is fast. Saddle acts as Mortar & Pestle.
- (Lvl 30) Iguanodon: Infinite Sprint on four legs, high jumping on two. Can turn plant into seeds.
- (Lvl 31) Mammoth: Wood gathering machine, and makes Wood weigh 75% less.
- (Lvl 34) Doedicurus: Stone gathering machine, and makes Stone weigh 75% less.
- (Lvl 36) Ankylo: Metal gathering machine, and makes Metal weigh 75% less.
- (Lvl 37) Sabertooth: Efficient at gathering Hides, Chitin, and Keratin. Decent speed.
- (Lvl 38) Pteranodon: First flying mount. Pretty speedy too. Can grab tiny dinos.
- (Lvl 40) Beelzebufo: e.g. giant toad, huge jumps, turns insects into Cementing Paste, fast in water.
- (Lvl 43) Pelagornis: Flyer that can land on water. Harvests fish easily. Fishing Pole from saddle.
- (Lvl 61) Castoroides: e.g. giant beaver, Wood gathering machine, gathering Wood automatically while Wandering. Wood, Stone, Thatch, and Fiber weigh 50% less. Fast swimmer. Saddle is mobile Smithy.
- (Lvl 62) Argentavis: Fantastic flyer with lots of Stamina and Carry Weight. Can pick up most medium-sized dinos, including Raptors, Titanboas, etc. Best everyday flying mount.
- (Lvl 69) Therizinosaur: Insanely versatile, bordering on OP. High health, high DPS. Left-click harvests Meat and Wood incredibly fast. Right-click harvests 100s of Fiber from bushes. C attack harvests Hide and Chitin from corpses, Berries from bushes. Each level-up also allows greater specialization in harvesting types (Delicate vs Power) via Interact Menu.
As you might expect, higher levels give you access to better options. Do note however, that your ability to actually find and/or tame these dinos are not assured at the level you could. For example, while you unlock the saddle at level 34, the Doedicurus curls up into a defensive ball after losing health, which makes knocking them out difficult without having Tranq Darts (unlocked at level 62). One of the few ways around that is to use a Beelzebufo’s attack, which adds Torpor while dealing little damage. But even then, the Beelzebufo saddle is only unlocked six levels after the other one.
Then there is the matter of finding these dinos. The Mammoth and Equus are relatively low level tames, but they are not commonly found in the South, which is where you might be spawning as a newer player. So, if you want to be taming creatures when you unlock their saddle, you might have to, ahem, hoof it yourself and find them.
Cooking Like a Pro
There are two types of recipes: Standard and Custom. It’s a good idea to utilize both.
Standard Recipes
All recipes below require there to be water in the cookpot, in form of a filled waterskin.
- Enduro Stew (+melee, +healing): Mejo (10), Carrot (5), Potato (5), Stimulant (2), Cooked Meat (9)
- Focal Chili (+crafting, +movement): Mejo (10), Yellow/Blue/Red (20), Lemon (5), Cooked Meat (9)
- Lazarus Chowder (+underwater): Mejo (10), Corn (5), Potato (5), Narcotic (2), Cooked Meat (9)
- Calien Soup (+hot area): Mejo (10), Yellow/Red (20), Lemon (5), Stimulant (2)
- Fria Curry (+cold area): Mejo (10), Blue (20), Corn (5), Carrot (5), Narcotic (2)
- Medical Brew (+40 HP): Red (20), Narcotic (2)
- Sweet Vegetable Cake (special): Fiber (25), Corn (2), Carrot (2), Potato (2), Stimulant (4), Sap (4), Giant Bee Honey (2)
As you might expect, the feasibility of having a ready stock of most of these items is dependent on having a robust Greenhouse situation and/or playing on a server with Crop Growth cranked up. Medical Brew is the exception, needing only some Narcotics and 20 Tintoberries, both of which can be harvested enmass by a Trike or other herbivore. The catch is the 2 hour spoilage timer, although it lasts longer when refrigerated.
Custom Recipes
While custom recipes might sound both cool and complicated, it is really neither. The steps are:
- Craft a blank Note.
- Place Note and ingredients in Cooking Pot.
- Click Make Recipe
- Ensure Recipe note is in Cooking Pot with ingredients, then start fire.
The final output is an item with a percentage of the effects of the individual ingredients. What percentage that ends up being is based on your Crafting Speed stat at Step 3 only. A full optimization would require a level-capped player to consume a Mindwipe Tonic, place all of their upgrades in Crafting Speed, consume a Focal Chili, and then pen some recipes before using another Mindwipe Tonic to get their stats back. Thereafter, whoever uses that recipe will get the full benefits no matter their Crafting Speed. Because that makes sense.
For the rest of us, the “hidden” benefits of custom recipes (with the help of Focal Chili) still makes things worthwhile. For example, a custom recipe for 20 Raw Meat creates an item that grants 43 Food and 32 HP. That may seem pitiful considering a single piece of Cooked Meat restores 20 Food and 8 HP. The upside is that the custom recipe doesn’t need to be cooked, weighs 0.3 pounds, and lasts for 48 hours in your inventory, rather than 20 minutes.
So, really, custom recipes are mainly about saving space and avoiding spoilage. Did your Mammoth get bogged down with hundreds of pounds of berries when it was harvesting lumber? A 10 lb stack of Tintoberries can get refined down to a 1.1 lb paste that grants you 53 Food and 15 HP.
Bonus tip: Stimberries and Stimulants are great for giving a Stamina boost at the expense of thirst. Cut out the downside by creating a custom food (as opposed to drink) recipe of, say, 50 Stimberries. That’ll give you 27 Food, 8 HP, and ~89 Stamina back without the thirst. Just note that these gains are capped at basically 1/second, but it should still aid in your sprint out of danger.
Harvesting Specialty Resources
Beyond the basic building resources like Stone and Wood, there exists a lot of specialty resources to craft more advanced items. Gathering these special resources is sometimes a pain, depending on the method. Here are some of the best.
Cementing Paste
The default method of creating Cementing Paste is x4 Chitin/Kreatin + x8 Stone. This is incredibly inefficient though, as it would require 200 Chitin/400 Stone for an Assault Rifle, or even 2400 Chitin/4800 Stone for a Wooden Tree Platform.
The best and easiest source are wild Beaver Dams. These are built by Castoroides, and are located on land or in the water. While accessing the inventory of a Beaver Dam will cause all nearby Castoroides to go hostile, each one usually contains 150+ Cementing Paste. Since items do not respawn inside containers, it’s best to loot (and drop) the rest, so that the Beaver Dam collapses and another one can spawn later.

Basically, any water feature not the ocean or swamp.
The second best source is from the Beelzebufo mount. Using Right-Click against insects will result in 5-15 Cementing Paste apiece, along with some Chitin. The biggest challenge is finding a stable enough insect population. The good news is that the mount is adept at navigating the same areas where Beaver Dams spawn, so one can double-dip in farming.
Third, there is a “passive” form of collection: from tamed Achatina, e.g. giant snail. These creatures will slowly accumulate both Achatina Paste (same properties as Cementing Paste) and Organic Polymer up to 100 apiece in their inventories. The catch is that Achatinas only eat Sweet Vegetable Cake, which requires both Sap and Giant Bee Honey, which are themselves specialty resources.
(Organic) Polymer
The default method of Polymer production is x2 Cementing Paste + x2 Obsidian. This isn’t too terrible by itself, although it requires the construction of a Fabricator, which uses Gasoline as its fuel. Organic Polymer can be substituted for Polymer in all situations, and the Ghillie Suit actually requires Organic Polymer specifically in its construction.
Note: You will want a Wooden Club or Metal Sword for harvesting Organic Polymer. A tamed Pelagornis will also work effectively. Hatchets or Picks will give you none.
The best and easiest farming target are Kairuku, aka penguins. Each iceberg in the NW corner of the Island has a dozen or so, and they react basically like the Dodo when attacked or threatened. Tragically, the babies have the most Organic Polymer, so club them first.

They are basically… ahem, sitting ducks.
If you are far from the North, the alternative source will be from Hesperornis, aka duck-like birds. You can typically find them swimming around shorelines and rivers hunting for fish. While they have zero offensive capabilities, note that that they frequently exist in otherwise dangerous areas. Keep an eye out for Sarcos, Spinos, and other river terrors.
Considering that Organic Polymer spoils extremely quickly (~30 minutes) and is unaffected by most preservation techniques, be sure and have the other materials/blueprints ready to go for when you collect this resource. The last thing you want to happen is collecting a bunch and then scrambling to find the other materials.
Obsidian
Black rocks on mountains. Go mine them.
Oil
There are several different sources of Oil in Ark, with different levels of ease of acquirement.
The first would be the Oil Rocks up in the NW corner of the Island, and scattered about in other snowy regions. While the environment is hostile, mining them is almost as easy as clubbing seals for Organic Polymer. The tricky part is actually traveling all the way up there, so be sure to stock up via boat or wagon train once you’ve made the effort.
Second would be the Oil nodes located in many places in the ocean. These are usually closer to home, but often require long dives in hostile waters. Cook some Lazarus Chowder and bring a dino that can breathe underwater. Underwater caves are another source, but chances are that you won’t be needing this guide if you are advanced enough to be plumbing those depths.
Third, is from killing/harvesting Trilobites and Leeches. You actually get a respectable amount of Oil from each kill, but the trouble is actually finding a suitable amount of targets. In that regard, be sure and stop what you are doing and kill them if you happen to spot any, no matter what else you might have been doing.
Finally, there is a quasi-passive source: Dung Beatles. These animals have to be tamed and brought out of the caves they inhabit, then be fed a constant source of Feces (tame a Phiomia) before it is turned into Fertilizer and a bit of Oil. While it ain’t nothing, Medium Animal Feces is turned into x2 Fertilizer and x4 Oil after 15 minutes. This might be enough Oil to keep the lights on (via Gasoline), but not for those endgame Industrial stations that need 400+ to craft.
Sap/Giant Bee Honey
These are combined because the only real reason you might need either is for Sweet Vegetable Cake, so they go hand-in-hand.
For Sap, there is no reasonable way to avoid crafting at least one Tree Sap Tap. Then you have to specifically place them high up in a Redwood Tree. Being able to collect the Sap will require either a Wooden Tree Platform (600 Cementing Paste!) or constructing your own janky scaffolding out of Wooden Pole and ladders. Once that’s done, visit it periodically to collect your 20 Sap.
Giant Bee Honey can be harvested from Giant Bee Hives, tamed or wild. The taming process to set up your own Hives in convenient locations is quite difficult, and requires a lot of prep work – Bug Repellent, Ghillie Suit, hand-feeding Rare Flowers to the Queen Bee, etc. If you don’t need a constant source of Sweet Vegetable Cake, it might be better to just note the locations of wild hives and swipe their honey when needed; a Ghillie Suit and fast escape mount are recommended.
Final Thoughts
Ark is a fascinating sandbox experience, even when just played in Single-Player. No matter how powerful you end up feeling, the game world is ready to remind you to take it seriously or suffer the sometimes absurd consequences. While even a low-level Argentavis mount can effectively (albeit slowly) murder the meanest Alpha predators with impunity, all it takes is one Microraptor sailing out of trees to knock you off your mount into a pool of Megapiranha before you realize how dangerous the world still is.
Hopefully the above guide is enough to give you the edge necessary to survive out there. Or at least live that much longer.
Spoiler-Free Beginner Ark Guide
There is no tutorial or hand-holding in Ark. The game is unfair, the world hostile, and the dinosaurs are without remorse. While that is part of the appeal of the game for some people, it can also serve as a barrier to others who might otherwise enjoy the experience. That’s the purpose of this guide: provide enough hand-holding to get you out of the nest safely, and into free-fall.
Whether you flap your wings afterwards, is up to you.
Spawning
When you first start Ark, you will have to choose a general starting area to spawn into the world, but the specific location will be random within that area. As the game text mentions, some areas are easier than others. While you cannot do much about the randomness at the beginning, one of the first things you will want to accomplish is removing the randomness by building a bed, and NOT a Sleeping Bag. Beds have infinite respawns, sleeping bags have one respawn.
Note: You can build more than one bed. In fact, I highly recommend you build at least two, even in your first starter base. There is a respawn cooldown of 5 minutes, but that’s per bed. This will allow you a 2nd chance at collecting your stuff if the first naked run doesn’t work out.
Basic Gathering
At the beginning, think Minecraft: punch trees for Wood and Thatch, collect rocks from the ground, then craft a Stone Pick. Use that to collect some more material to craft a Stone Hatchet. Between the two, the Hatchet will collect more building material (Wood, Stone, Hide) from an object, whereas the Pick will collect “special” material better (Flint, Metal, Meat). For the majority of the game, the Hatchet is where it’s at.
By the way, save every piece of Flint, Charcoal, and Spoiled Meat you find/create. You’ll be using those quite a bit for mid-game stuff.
Death
Dying in Ark is practically an everyday experience in the beginning, especially before you get to taming a lot of dinos. When you die, everything that you were carrying will drop to the ground into a backpack, which will despawn in 15 minutes. Additionally, your backpack will (usually) have a beam of green light shooting out of it, to assist in recovering your gear.
There are some key things to note here, given the above. The biggest is the fact that whatever killed you will still be hanging around your corpse. Dinos will wander around randomly, but they frequently do not roam large distances, and certainly not within a tidy 15-minute timeframe. So, you will need to make a decision about whether or not it’s worth trying to grab your stuff. That decision will also be informed about whether or not you can grab your stuff naked, which is your immediate condition having just respawned.
Here is a good breakdown off “the rules” then:
- Only carry what you are willing to lose.
- Die in a convenient location.
- Don’t be greedy.
The first rule is just a basic philosophy that you will need to embrace in Ark. Do you really need to be running around in your best armor and weapons all the time? Are you sure that carrying two rafts in your inventory is a good idea when exploring a cave? Unlike a lot of games, the basic armor and weapons of Ark are still viable for a large portion of encounters you’ll face. Once you have tons of resources and duplicates, sure, go out there in your Sunday best. But only do that if you’re not afraid of losing what you got.
A convenient location to die would be one in which is farther from whatever killed you to begin with, but easy to access for your replacement. Sometimes this means throwing yourself from a cliff, sometimes this means not throwing yourself from a cliff. Similarly, forcing that Carno to chase you into the water means there will be a buffer to snag your stuff back. Then again, there could be a swarm of sharks in the area too. Try your best, but also acknowledge that sometimes you will need to cut your losses and move on.
Finally, being greedy means hitting up one last node despite having already collected more than you need. Every moment away from home is a risk, and nothing in your inventory is really yours until it makes it back into container. Besides, you’ll likely have more than one death due to something dumb like Compys who ate your ankles because you gathered 20 more pounds of Metal Ore and became too encumbered to run away.
Inventory Interaction
By default, E is the button to interact with just about everything: containers, campfires, dino inventories, etc. This will get annoying over time though, because pressing E around a campfire will light/smother the flames rather than giving you access to the Cooked Meat you wanted. Get in the habit of pressing F to access inventories instead. Pressing F will directly access the inventory of your target, up to and including a dino you might be riding.
Taming
This might seem silly to mention, but this is a dinosaur taming game. When I first started playing, I didn’t tame anything until level 21 when I unlocked Tranquilizer Arrows. This was a mistake. You can and should be taming dinos as soon as you have your basics covered, e.g. hut with some storage and a bed.
Here are the steps to taming:
- Render a dino unconscious.
- Feed it food it likes.
- ???
- Profit
Some dinos are tamed “passively,” which means skipping step 1). For the vast majority though, you need to knock them out. You accomplish that by dealing Torpor damage. The early game options available for inducing Torpor are: Slingshot, Wooden Club, and Tranq Arrows. While it will be quite a challenge to knock out fast-moving predators like Raptors with something like a Slingshot, there are a lot of dinos that are fairly slow and can be kited around. In the early game, for example, Dilos make excellent guard dogs. And if you manage to make it on top of a rock or cliff that the dino can’t reach, you can typically knock out just about anything.
Once unconscious, go up to the dino and access it’s inventory by pressing E or F. Transfer food from your inventory to theirs, either by left-clicking for individual items, or by pressing T to transfer the entire stack. While there is special “kibble” that can be used to speed up the process, you can stick with raw meat for carnivores and berries for the herbivores. Special note for the latter though, do NOT give them Stimberriers – eating those can make the dino wake up faster.
Depending on the server settings, taming dinos can take a long time. To keep them unconscious, you’re going to need to keep their Torpor meter up. Beating them with a Wooden Club can do this, but any damage taken will reduce Taming Effectiveness, which in turn makes the dino gain fewer bonus levels. Typically, you’ll want to use either Narcoberries or Narcotics. Place either one into the dino’s inventory, hover over the icon and press E. This will “force-feed” the dino the item. The Torpor gain will not be immediate, but rather gradual. Depending on the dino, you may need to force-feed them quite a few.
Note: many older videos/guides used the term “Remote Use Item,” which doesn’t exist in the game anymore. Pressing E on an item in the dino’s inventory does the same thing.
Controlling Dinos
Once you have tamed a dino, there are several means by which you can control them. If you have a saddle available, you can directly mount them and ride around. Some dinos are more useful than others as actual means of transportation though. Raptors are extremely fast, for instance, whereas Trikes are extremely slow. That said, saddles give you access to a given dino’s special talents, which sometimes more than makes up for its other deficiencies. For example, that same slow Trike can harvest 100s of berries at a time from nearby bushes, but only if you are riding it with a saddle.
Dinos are still extremely useful even without a saddle. If they are on Follow Mode and Attack MY Target, they will, well, follow you around and help kill your foes. This can and will save your life many a time if you happen to stumble into a bad situation you were not prepared for. If you are trying to tame additional dino pals though, be sure to switch your current bodyguards to Passive.
Surviving the Early Game
As mentioned previously, Ark is unfair. But it is unfair in fairly consistent ways. There will be times when there really is nothing you can do to avoid death. Other times? You can survive. Here are some quick tips for the common causes of death in the early game.
Dilos – Counter: Spears. The biggest gimmick with Dilos is their spit attack. It’s sometimes difficult to juke, so I like to jump right before they spit, which usually causes it to sail over my head. Beyond that, a simple Wooden Spear has greater reach than their melee attack, and will knock them back far enough to strike again with relative impunity.
Raptor – Counter: Bolas. Raptors are too fast to outrun, and spears aren’t near strong enough to keep them at bay. But a single Bola will automatically root them for ~30 seconds. Once rooted, shoot them in the face, or maybe beat them unconscious with a Wooden Bat if you have one handy.
Carnos – Counter: Turtles. Truly one of the more annoyingly unfair dinos in the early game, Carnos have a HUGE aggro radius and will relentlessly chase you down with what seems like infinite Stamina. One trick though, is that if you can kite them into the path of a turtle (i.e. Carbonemys), the Carno will injure itself and start attacking the turtle instead. Take that opportunity to book it or try and take it down.
—–
Hopefully the above is enough get you started in your Ark experience.

Gambling is Gambling
Oct 18
Posted by Azuriel
There have been a lot of posts about loot boxes lately, here and elsewhere. In fact, even the ESRB have weighed in on the subject, determining that:
This is the sort of absurd logic that allows Pachinko parlors to exist in Japan despite more traditional gambling being illegal. “It’s not real gambling because you’re buying and winning steel balls… and trading them for prizes… which you then sell for real cash at a sketchy booth literally 5 feet from the parlor doors. But no slot machines!”
Maybe all the casinos in the US should start giving out commemorative business cards or wooden nickles to people who lose, so that they can avoid gambling regulations. You wanted X, and spent real money to get it, but got Y instead. #TotallyNotGambling
Look, we can have the semantic argument if you want. But you know it, I know it, the devs know it, scientists know it: loot boxes are gambling.
“What about Magic and Pokemon cards then!?”
Also gambling. In my replies on the subject up to this point, I played the role of TCG Apologist a bit. You know, all “these games feature pack opening as a central conceit, which is completely different than in Star Wars Battlefront 2, in which the system is just bolted on as a cynical revenue stream.” But… honestly? The gameplay of paper Magic exists completely independently of how you acquire the cards. If everyone who played had every card available by default, the only real things that would change would be the game being more fair (e.g. less P2W) and WotC making less money.
Keen replied in the comments of his own post:
Even Bhagpuss stated:
Please excuse my tone, but that is some Econ 101 perfectly rational economic actor bullshit. And a complete tautology besides. Like, how do you conceptualize a reality in which that is true, and yet the concept of Buyer’s Remorse exists? People make dumb economic decisions all the time. Are the people buying $2 lottery tickets doing so because they expect at least $2 of value in return? If they are, and they’re buying them when the jackpot is less than $500 million, they are irrational. The expected value of a $2 Powerball ticket is -$1.38. Similarly, the expected value of any given paper Magic booster pack will quickly (if not instantly) fall into the negatives, considering that the alternative means anyone can make free money by just opening the packs.
We can try and put a value on the “hope” and “dreams” of getting X instead of Y, but the bottom line is always the same: by virtue of paying real cash money, you had a chance at getting X and instead got Y. That’s gambling whether its a Charizard, a Black Lotus, or Boba Fett’s Rank IV Death from Above star card.
Is it legally gambling right now? No. Does the ESRB consider it gambling? No. But we all know what’s happening here, and the psychological mechanisms involved. Rational people do not buy loot boxes – the entire target market is for irrational people. And its profoundly sad, in a sort of “did we seriously give little kids candy cigarettes for Halloween?” way.
What do I want to see happen? Simple: a spade gets called a spade. Games that feature gambling as a revenue stream get labeled AO by the ESRB, and the exact odds of any loot box are posted on a company’s website. If that also means people have to show ID to pick up Magic boosters, then okay. The less odious things would still survive, e.g. TCGs most likely, and the more odious loot box offenders would shift on to their next novel revenue stream. Hopefully one that does not specifically and (arguably) maliciously target people who can’t help themselves.
Do you guys remember when video game designers only got paid more when they made their game worth purchasing by more people? You know, that golden age of gaming in which producer and consumer interests aligned? Those were good days. I’d like to get back there at some point, without all the Consumer Surplus erosion.
Posted in Commentary
17 Comments
Tags: Consumer Surplus, ESRB, Gamble Boxes, Gambling, Loot Boxes